


Understanding how your heart responds to different levels of effort can completely change the game—whether your goal is to build endurance, boost performance, or just keep the body moving. That’s where heart rate training zones come in. By aligning your workouts with specific zones, you can train with intention, not just intensity.
Here’s a breakdown of the 5 primary heart rate zones, what they do for you, and how to use them to hit your goals.
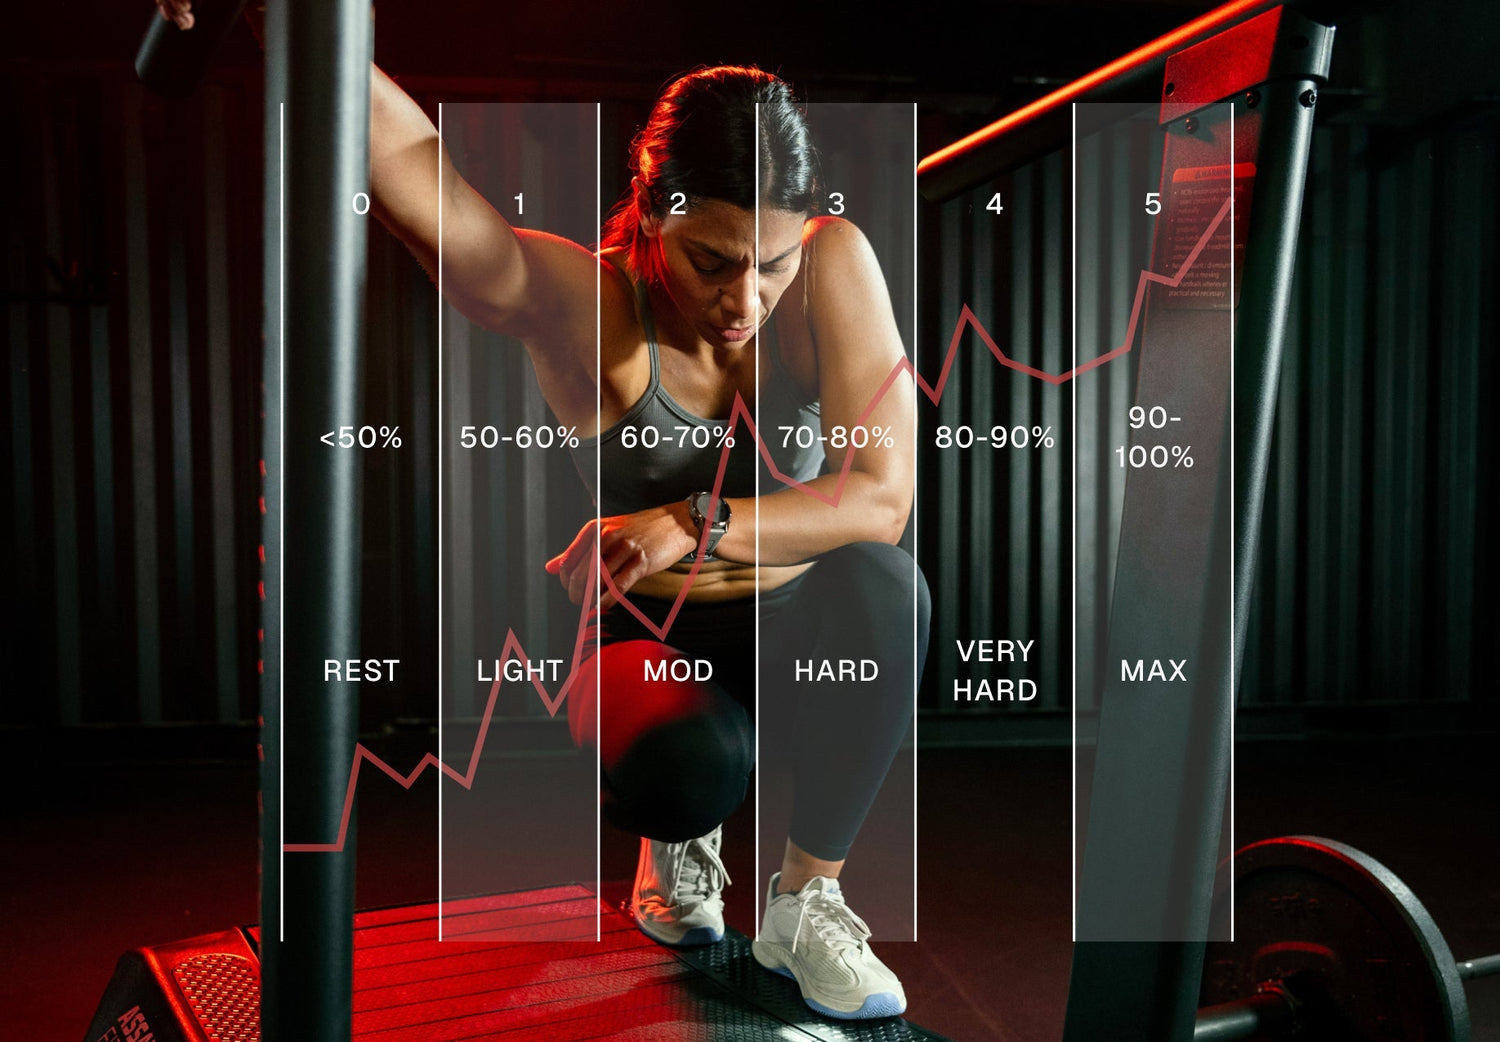
Zone 1: Recovery & Base (50–60% of Max HR)
What It Is: Very light activity—walking, mobility work, or cruising on the AssaultBike.
Why It Matters: Zone 1 promotes blood flow, supports recovery, and builds aerobic efficiency without stressing your body. It’s where your body learns to burn fat as a primary fuel source.
When to Use It:
-
On recovery or active rest days
-
After intense sessions for cooldown
-
During long, easy aerobic efforts
Science Says: Light aerobic work increases parasympathetic activity, helping you recover faster and build long-term durability.
How to Know You’re In It: Breathing is easy, you can talk comfortably, and your effort feels like a warm-up.
Zone 2: Aerobic Efficiency (60–70% of Max HR)
What It Is: Easy to moderate effort—jogging, steady rides, or long sessions on the AssaultRunner or Rower.
Why It Matters: Zone 2 improves your ability to use oxygen efficiently and strengthens your aerobic foundation—crucial for all other zones.
When to Use It:
-
For building cardiovascular endurance
-
During longer, consistent efforts
-
On aerobic-focused days or as part of base-building blocks
Science Says: This zone boosts mitochondrial function and fat metabolism—core adaptations for endurance and recovery.
How to Know You’re In It: You can talk in full sentences, but you're clearly working. Breathing is deeper but controlled.
Zone 3: Aerobic Threshold (70–80% of Max HR)
What It Is: Moderate, sustained effort—tempo runs, metcons, or longer circuits where you’re moving consistently.
Why It Matters: This zone improves your lactate threshold, allowing you to go harder for longer without fatigue.
When to Use It:
-
For general conditioning
-
To prep for races or longer events
-
During “sweet spot” workouts that balance challenge and control
Science Says: Zone 3 increases stroke volume (the amount of blood your heart pumps per beat) and raises the point at which lactic acid begins to accumulate.
How to Know You’re In It: You’re breathing hard, can speak in short phrases, and your body is under a consistent load—but you’re not redlining.
Zone 4: Anaerobic Power (80–90% of Max HR)
What It Is: High-intensity, tough effort—intervals, finishers, and fast-paced functional workouts.
Why It Matters: Zone 4 improves speed, power, and your ability to buffer and clear lactic acid. It’s where you build performance and grit.
When to Use It:
-
During short, high-intensity intervals
-
To train race pace or simulate game-time efforts
-
As a targeted block in performance training
Science Says: This zone pushes your body to adapt to high lactate levels, increasing anaerobic threshold and recovery capacity.
How to Know You’re In It: You’re breathing heavily, talking is difficult, and effort feels intense—but sustainable in short bursts.
Zone 5: Max Effort (90–100% of Max HR)
What It Is: All-out intensity—sprints, max intervals, and test efforts where you give it everything you have.
Why It Matters: Zone 5 develops peak speed, power output, and mental toughness. It also boosts VO₂ max—the upper limit of your aerobic capacity.
When to Use It:
-
For short sprint intervals
-
To increase explosive capacity
-
When peaking for competition or testing fitness
Science Says: Training in this zone activates fast-twitch muscle fibers, improves oxygen utilization under stress, and increases neuromuscular coordination.
How to Know You’re In It: You’re maxed out. Breathing is near-maximum, muscles are screaming, and you can’t talk at all.
How to Track It
Estimate your max heart rate with the formula: 220 - your age. A heart rate monitor or wearable is the most accurate way to track—though the “talk test” and perceived effort are great tools when going tech-free.
Train With Intention
At Assault Fitness, we build tools that respond to your effort—whether you’re cruising in Zone 1 or hitting your limit in Zone 3. When you understand your heart rate zones, every second on the AssaultBike, Runner, or Rower becomes a step closer to your goals.
Train smart. Recover better. Perform your best.


Leave a comment
This site is protected by hCaptcha and the hCaptcha Privacy Policy and Terms of Service apply.